The Allure of Pan-Fried Fish: Fast, Fresh, and Flavorful
In the realm of quick, satisfying meals, few dishes rival the sheer simplicity and delicious payoff of perfectly pan-fried fish. Imagine a golden-brown crust, irresistibly crispy, giving way to a tender, moist, and flaky interior – all achieved in a matter of minutes. This isn't just a recipe; it's a technique that transforms humble fish fillets into a culinary triumph, making it the ideal choice for a busy weeknight dinner or an impressive, yet effortless, weekend lunch.
What makes pan-fried fish a true weeknight hero? Beyond its incredible speed, often clocking in at under 20 minutes from prep to plate, it offers an unparalleled fresh taste. The direct heat of the pan seals in natural flavors, while a judiciously chosen coating adds texture and depth. It's a method that highlights the delicate nature of fish, allowing its inherent qualities to shine without being overshadowed by heavy sauces or complicated preparations. Master this technique, and you unlock a world of versatile, healthy, and utterly delicious meal options.
Selecting & Preparing Your Fillets for Success
The journey to crispy, flaky pan-fried fish begins long before it hits the hot skillet. The quality and preparation of your fish fillets are paramount to achieving that perfect result.
Choosing the Right Fish
For pan-frying, tender to medium-firm white fish fillets are your best friends. These varieties tend to hold their shape well while cooking and develop a beautiful crust. Excellent choices include:
- Tilapia: Mild and readily available, a fantastic starting point for beginners.
- Cod: Flaky with a mild, slightly sweet flavor.
- Snapper: Firm, moist, and flavorful.
- Sea Bass: Rich, buttery, and incredibly flaky.
- Grouper: Lean, firm, and has a distinctive mild flavor.
- Trout: A freshwater option, often with a slightly stronger, nuttier taste.
- Flounder or Sole: Delicate and quick-cooking, excellent for a lighter meal.
Aim for fillets that are relatively uniform in thickness (around 1-inch is ideal) to ensure even cooking. If you have thicker pieces, you might need to adjust cooking times slightly. Always opt for fresh fish from a reputable source, looking for clear eyes (if whole), firm flesh, and a mild, oceanic scent – never "fishy."
Prepping for Perfection: Seasoning and Scoring
Even the best fish needs a little love before cooking.
- Pat Dry, Thoroughly: This is a crucial, often overlooked step. Excess moisture on the fish surface will create steam in the pan, preventing that coveted crispy crust from forming. Use paper towels to pat both sides of your fillets until they are as dry as possible.
- Season Liberally: Simple seasonings often yield the best results. A generous pinch of sea salt and freshly ground black pepper is a fantastic foundation. For more adventurous palates, consider a homemade fish seasoning blend, garlic powder, onion powder, smoked paprika, or a touch of cayenne for heat. You can even tailor your seasoning to the meal – taco seasoning for fish tacos, or a lemon-dill blend for a classic presentation.
- Score the Fish (Optional, but Recommended): To prevent thinner fillets from curling up aggressively in the hot pan, lightly score the skinless side (or the side that will be face down first if skin-on) with 2-3 shallow, parallel cuts using a sharp knife. These cuts, about 1/8 to 1/4 inch deep, help the fish lay flat by releasing muscle tension, ensuring more even contact with the pan and a consistent crust.
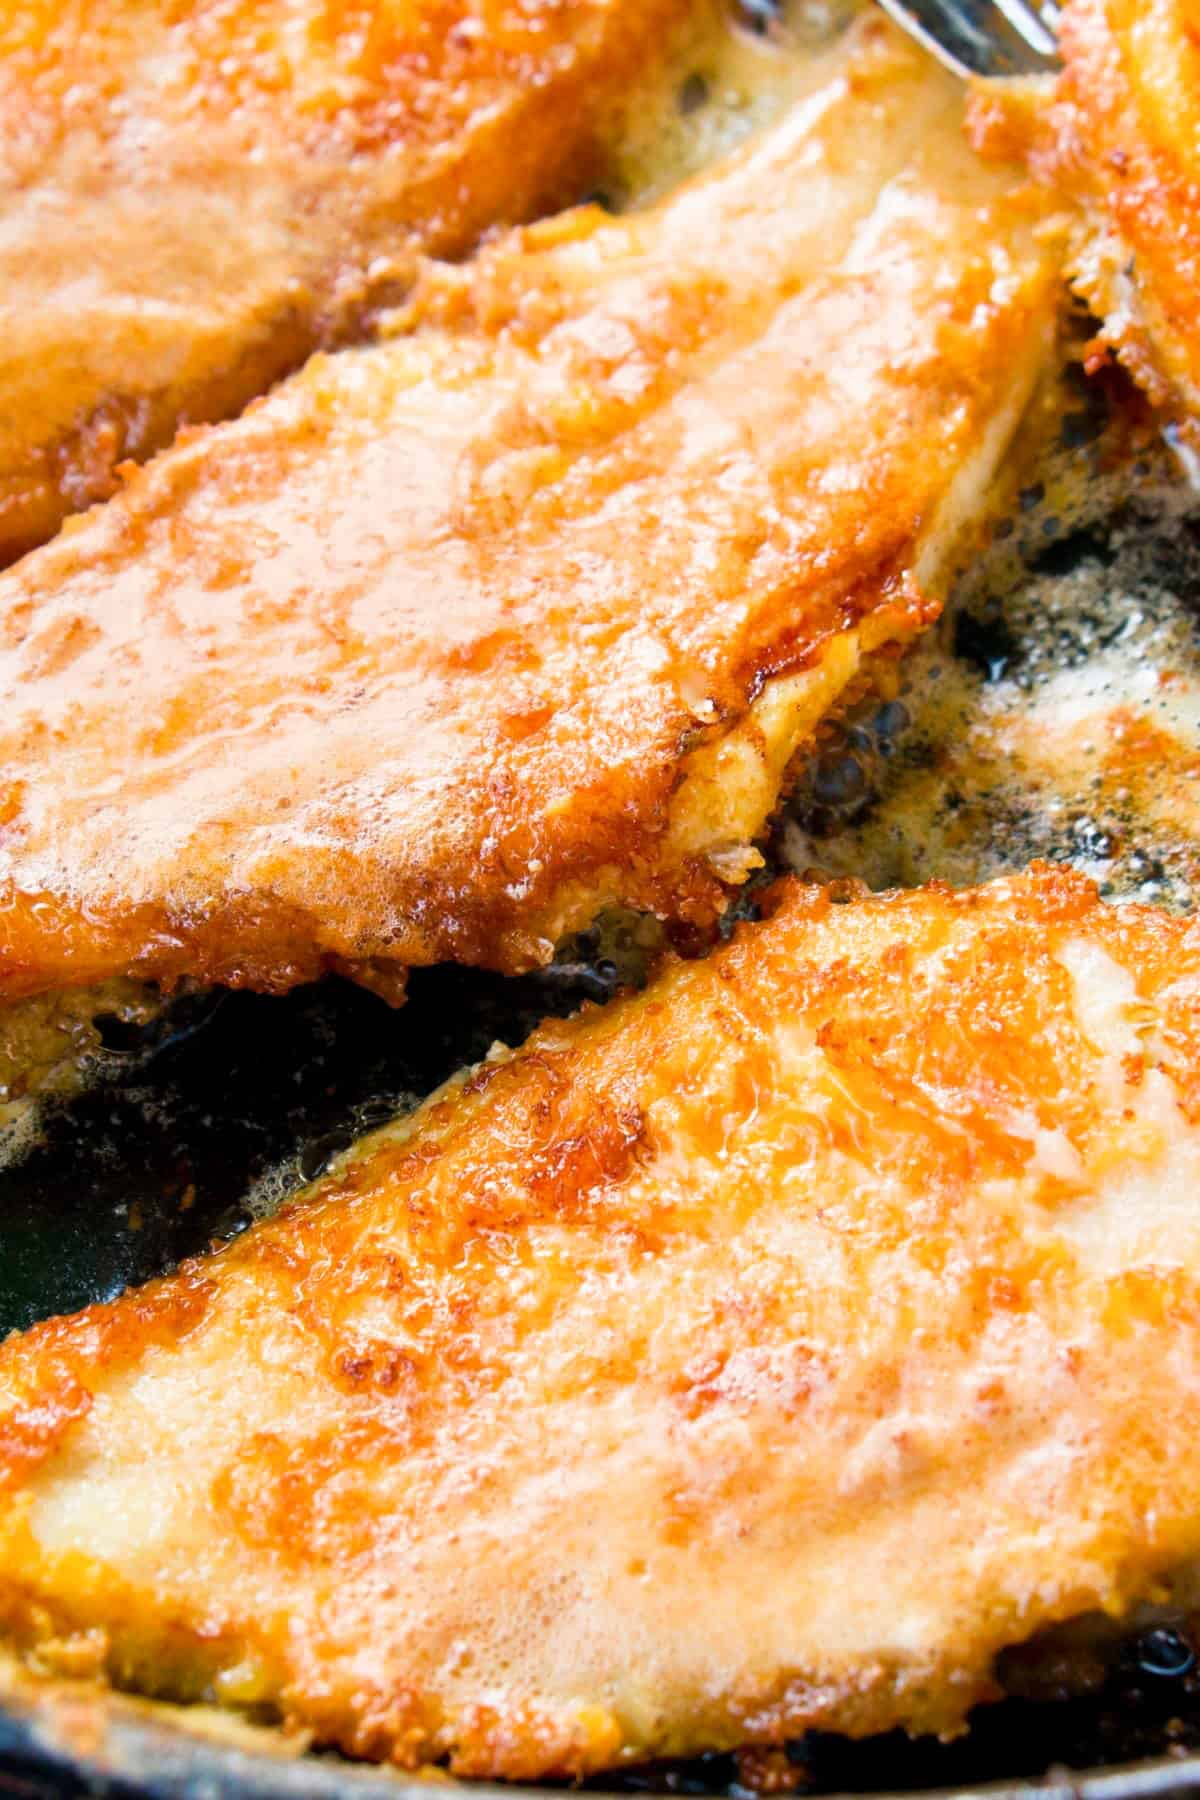
Crafting the Ultimate Crispy Coating
The coating is where much of the magic happens, turning a simple fillet into a crispy pan-fried fish masterpiece. There are two primary approaches, each with its own advantages.
The Simple Flour Dust
For a truly quick and light pan-fried fish, a simple dusting of all-purpose flour is often all you need. After seasoning your fish, lightly dredge each fillet in a shallow plate of flour, shaking off any excess. This thin layer creates a delicate, crispy crust when it hits the hot oil, locking in moisture and delivering a delightful texture without feeling heavy. This method is incredibly fast and allows the natural flavor of the fish to truly shine. For a comprehensive guide on this speedy approach, check out our article:
Quick & Crispy Pan Fried Fish: Your 10-Minute Weeknight Meal.
The Double-Dredge for Extra Crunch
If you crave a more substantial, almost batter-like crispness, the double-dredge method is your secret weapon. This technique, often used in classic breading, creates an extra layer of texture and seals in even more flavor.
- Set up Your Stations: Prepare three shallow dishes. One for seasoned all-purpose flour, another for a whisked egg (or egg mixed with a splash of milk or water), and a third for more seasoned flour.
- The Process: First, dredge the seasoned fish in the flour, shaking off excess. Next, dip it into the egg wash, allowing any extra to drip off. Finally, dredge it a second time in the seasoned flour, pressing gently to ensure an even, generous coating. This layering creates a robust barrier that crisps beautifully. The seasoning integrated into both the flour and the egg ensures flavor from the inside out, making every bite delicious.
This method is fantastic for creating versatile crispy breaded fish that can stand alone or be incorporated into other dishes, offering endless flavor customization options. To explore more about customizing your flavors, visit:
Easy Pan Fried Fish: Customize Flavors for Any Quick Meal.
Mastering the Pan-Frying Technique
With your fish prepped and coated, the final stage is the cooking itself. Precision here makes all the difference between good and truly great pan-fried fish.
Heat Management is Key
A common mistake is cooking on too low or too high heat. Aim for
medium-high heat. This allows the pan to get hot enough to immediately sear the fish, creating a crust, without burning the coating before the interior cooks.
- Choose the Right Fat: Use a cooking oil with a high smoke point, such as canola, vegetable, grapeseed, or avocado oil. A combination of oil and a knob of butter can add incredible flavor, but watch the butter to prevent burning. You need just enough fat to thinly coat the bottom of the pan ��� typically 1-2 tablespoons.
- Preheat the Pan: Place your pan (cast iron or stainless steel work wonderfully) over medium-high heat and let it get hot *before* adding the oil. Once hot, add the oil and let it shimmer. A drop of water should sizzle instantly.
- Don't Overcrowd the Pan: Cook fish in batches if necessary. Overcrowding drops the pan's temperature, leading to steaming instead of searing, and a soggy rather than crispy crust. Give each fillet ample space.
When to Flip: The Golden Rule
Patience is a virtue when pan-frying fish. Resist the urge to constantly move or flip the fillets.
- Visual Cues: Cook the first side until you see a beautiful golden-brown crust forming along the bottom edge of the fish. The edges of the fillet will also start to turn opaque. This usually takes 3-5 minutes, depending on the thickness of your fish.
- The Release: A well-seared fish will release easily from the pan. If it's sticking, it likely hasn't developed a sufficient crust yet. Give it another minute.
- Flip Once: Use a thin, sturdy spatula to carefully flip the fish. Cook the second side for another 2-4 minutes, or until cooked through.
Ensuring Doneness: No More Guesswork
Overcooked fish is dry and unappealing, while undercooked fish is unsafe.
- The Flake Test: The most common method. Insert a fork into the thickest part of the fish. If it flakes easily, it's done.
- The Thermometer Test: For absolute precision, a probe thermometer is your best friend. Insert it into the thickest part of the fillet; the internal temperature should reach 145°F (63°C).
Troubleshooting Common Issues
- Fish Sticking: Pan wasn't hot enough, not enough oil, or you tried to flip too soon. Ensure proper preheating and adequate oil.
- Soggy Coating: Pan was overcrowded (creating steam) or not hot enough (preventing searing).
- Burning Coating: Heat was too high. Reduce heat slightly after the initial sear.
Serving Your Masterpiece & Handling Leftovers
Once your pan-fried fish is perfectly cooked, it's time to enjoy the fruits of your labor!
Perfect Pairings and Creative Uses
Pan-fried fish is incredibly versatile. It shines with simple accompaniments but also serves as a fantastic base for more elaborate dishes.
- Classic Sides: A squeeze of fresh lemon, steamed white rice, and a side of green vegetables like broccoli, asparagus, or green beans are timeless pairings that highlight the fish's flavor.
- Heartier Options: Pair with crispy air fryer potato fries, sweet potato wedges, or a creamy mac and cheese.
- Fresh Salads: A vibrant Southern cucumber salad or a kale and broccoli salad with a sweet and sour dressing offers a refreshing contrast.
- Creative Applications: Don't limit yourself to eating fillets whole! Cut them up for delicious fish tacos, toss them into a pasta dish, or use them as a lighter alternative to breaded chicken in dishes like fish piccata (add the sauce just before serving to maintain crispiness).
Best Served Fresh, But Smart Leftover Storage
Pan-fried fish is truly at its peak when served immediately, straight from the skillet. The delicate proteins of fish tend to overcook easily when reheated, which can lead to a dry texture. However, if you do find yourself with leftovers:
- Storage: Allow the fish to cool completely, then store it in an airtight container in the refrigerator for 1-2 days.
- Reheating: To restore some of its former glory, avoid the microwave. Instead, place leftover fish on a baking sheet in a preheated oven at 350°F (175°C) for about 10-15 minutes, or until heated through. This gentle heat helps crisp up the coating somewhat without drying out the interior too much.
- Freezing Cooked Fish: While generally not recommended due to texture degradation, if you absolutely must freeze cooked fish, ensure it's completely cooled, then wrap it tightly in plastic wrap and aluminum foil before placing it in a freezer-safe bag. It's best consumed within 1-2 months, but expect a noticeable change in texture upon thawing and reheating.
By following these pro tips, you're not just cooking fish; you're mastering the art of creating perfectly crispy, incredibly flaky pan-fried fish every single time. It's a testament to the idea that some of the most delicious meals are also the simplest. So grab your skillet, choose your favorite fillet, and get ready to enjoy a truly exceptional meal.